
These collaborative Christmas cards are the perfect activity to enjoy while kids are gathered for Thanksgiving or other holiday celebrations. Just be sure to complete them early in the season to allow plenty of time to mail them to your Christmas card list.
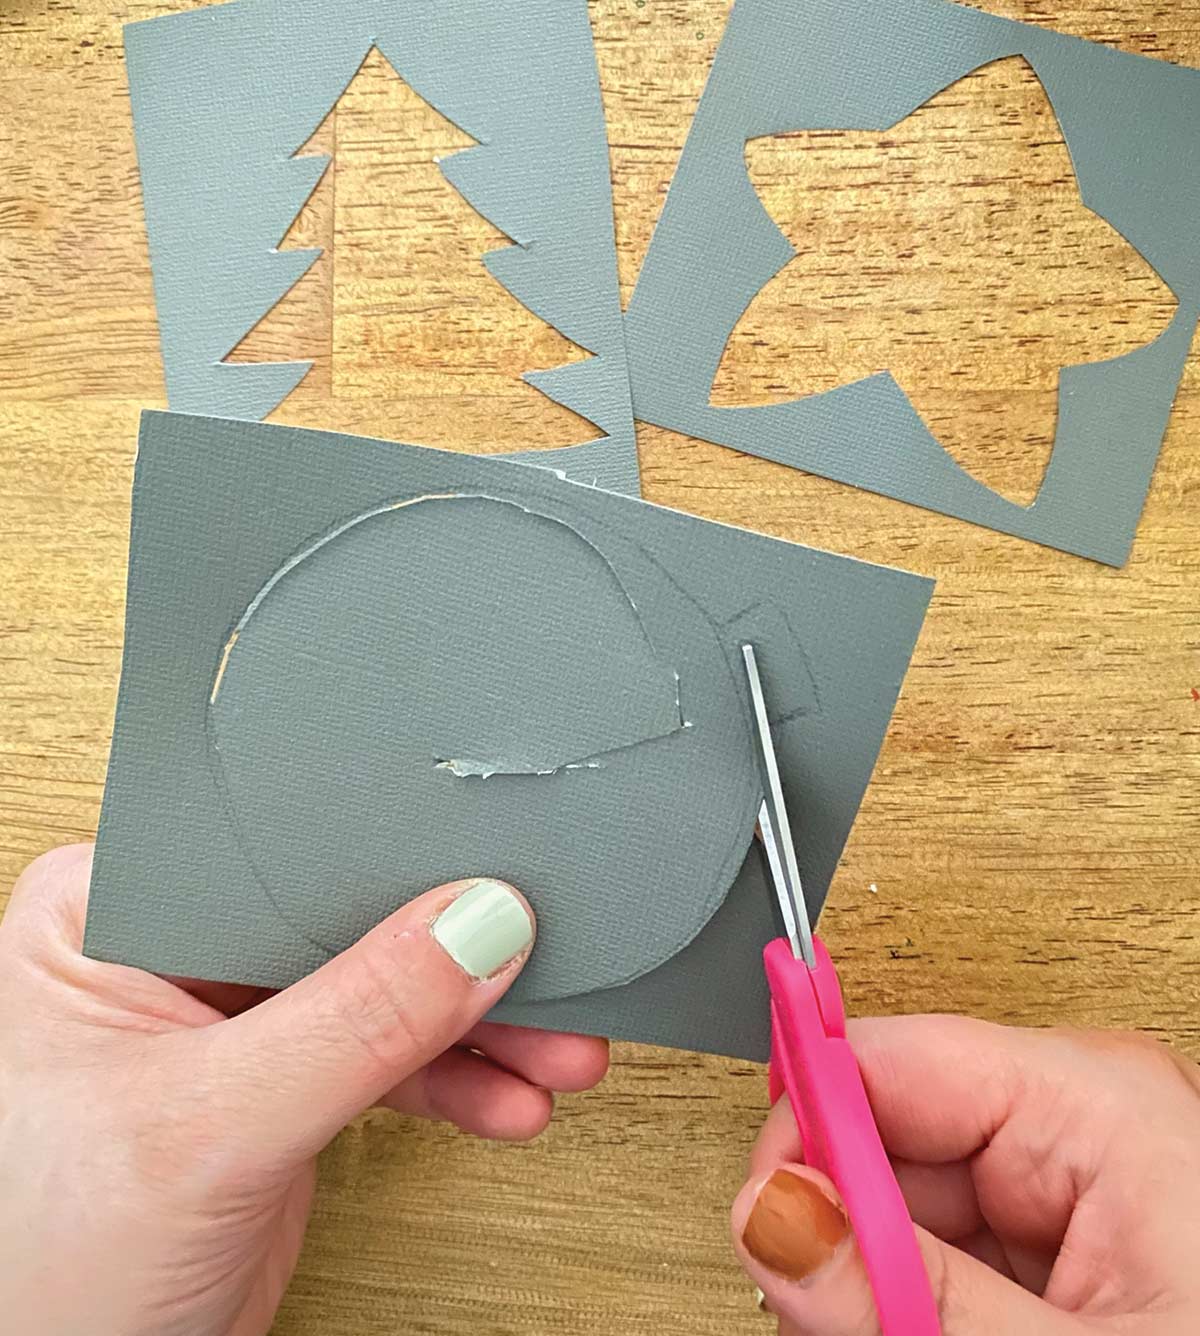
Begin by creating stencil cutouts from the cardstock. These cutouts will provide the design framework for each Christmas card and help children stay inside the designated workspace during the painting process.
You’ll need one stencil per card. If you want to create thirty cards together with three card designs, you’ll need to create ten stencil cutouts of each design.
To create the cutouts, cut pieces of cardstock to match the size of your greeting cards. Then draw your desired stencil on each piece of cardstock with a pencil and use the scissors to cut out the shape from inside the drawing.
Tip: It’s best to create these cutouts in advance if you have more than a few stencils to prepare. Advanced preparation makes the most of short attention spans by allowing kids to get to the fun part quickly.
For this project, you will need:
- Blank cards and envelopes
- Acrylic craft paints (one color per child)
- Cardstock or paper with similar thickness
- Black Sharpie
- Pencil
- Scissors
- Palettes or paper plates
- Painters tape (optional)
- Baby wipes for quick cleanup (optional)
It’s also important to have adult or teen supervision for this project, especially if little ones are participating. It doesn’t require much precision, but it can get messy if the artists aren’t paying attention to their finger placements. That’s where supervision saves the day!
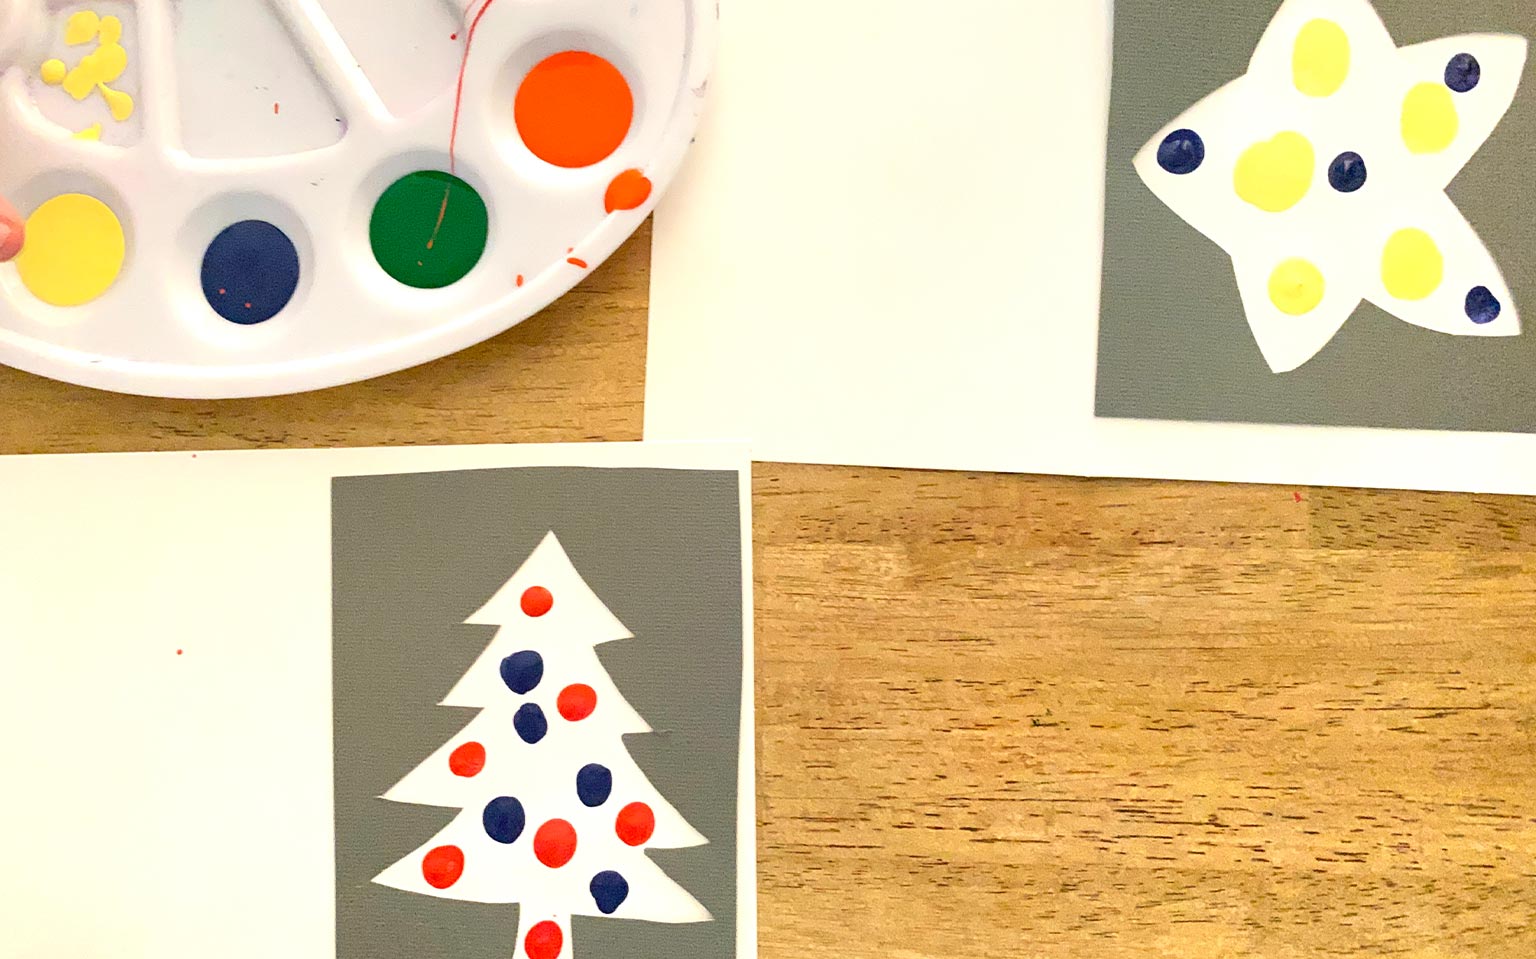
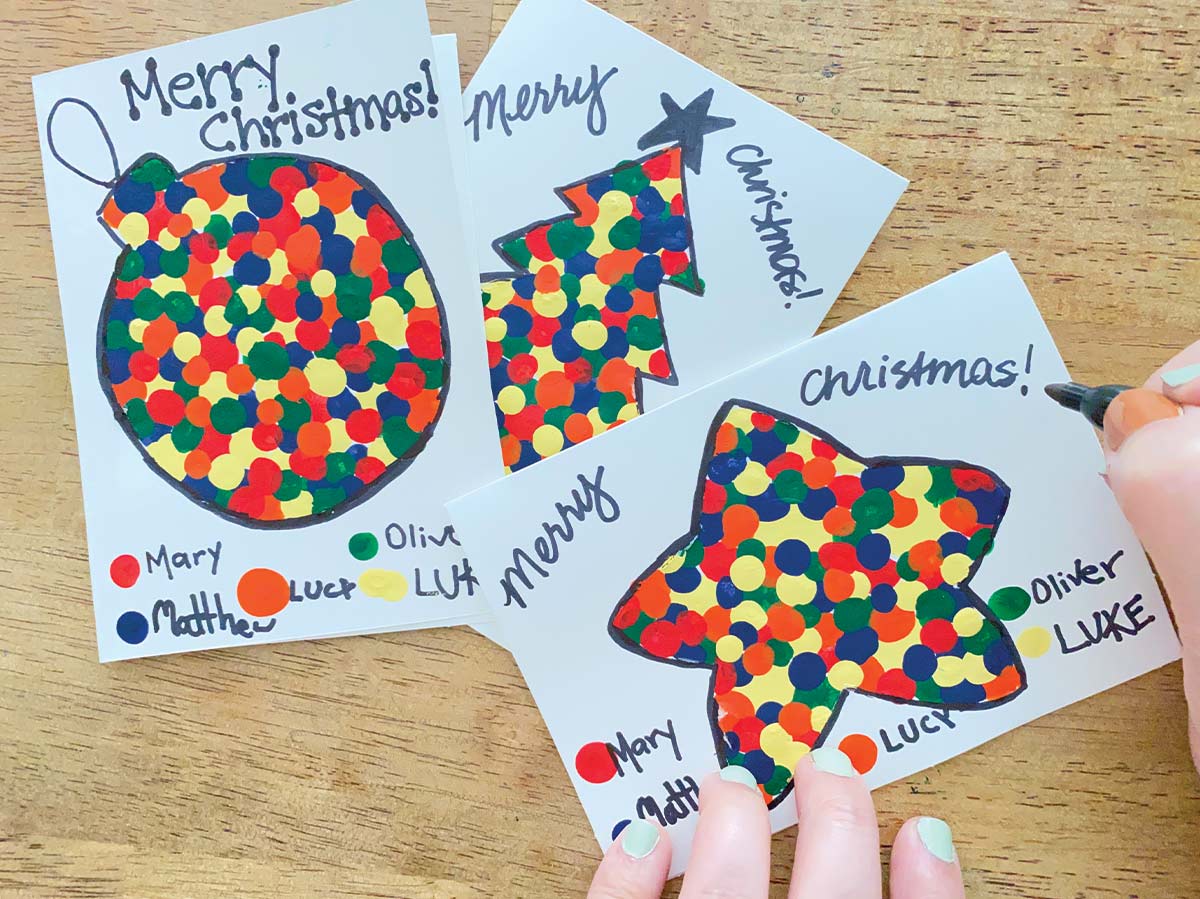
Place a stencil cutout on the top of each card. You can use painters tape to secure the stencils and cards or simply encourage kids to hold them in place as they work.
Have kids choose one paint color to use as their signature color. Then have each child dip a fingertip into the chosen paint color and add several dots onto the card inside the cutout. These fingertip dots are “signature dots” that represent each child’s contribution to the cards.
When kids finish their dots on their first cards, they can move to another workspace or switch cards with a neighbor so they can add their dots to other cards.
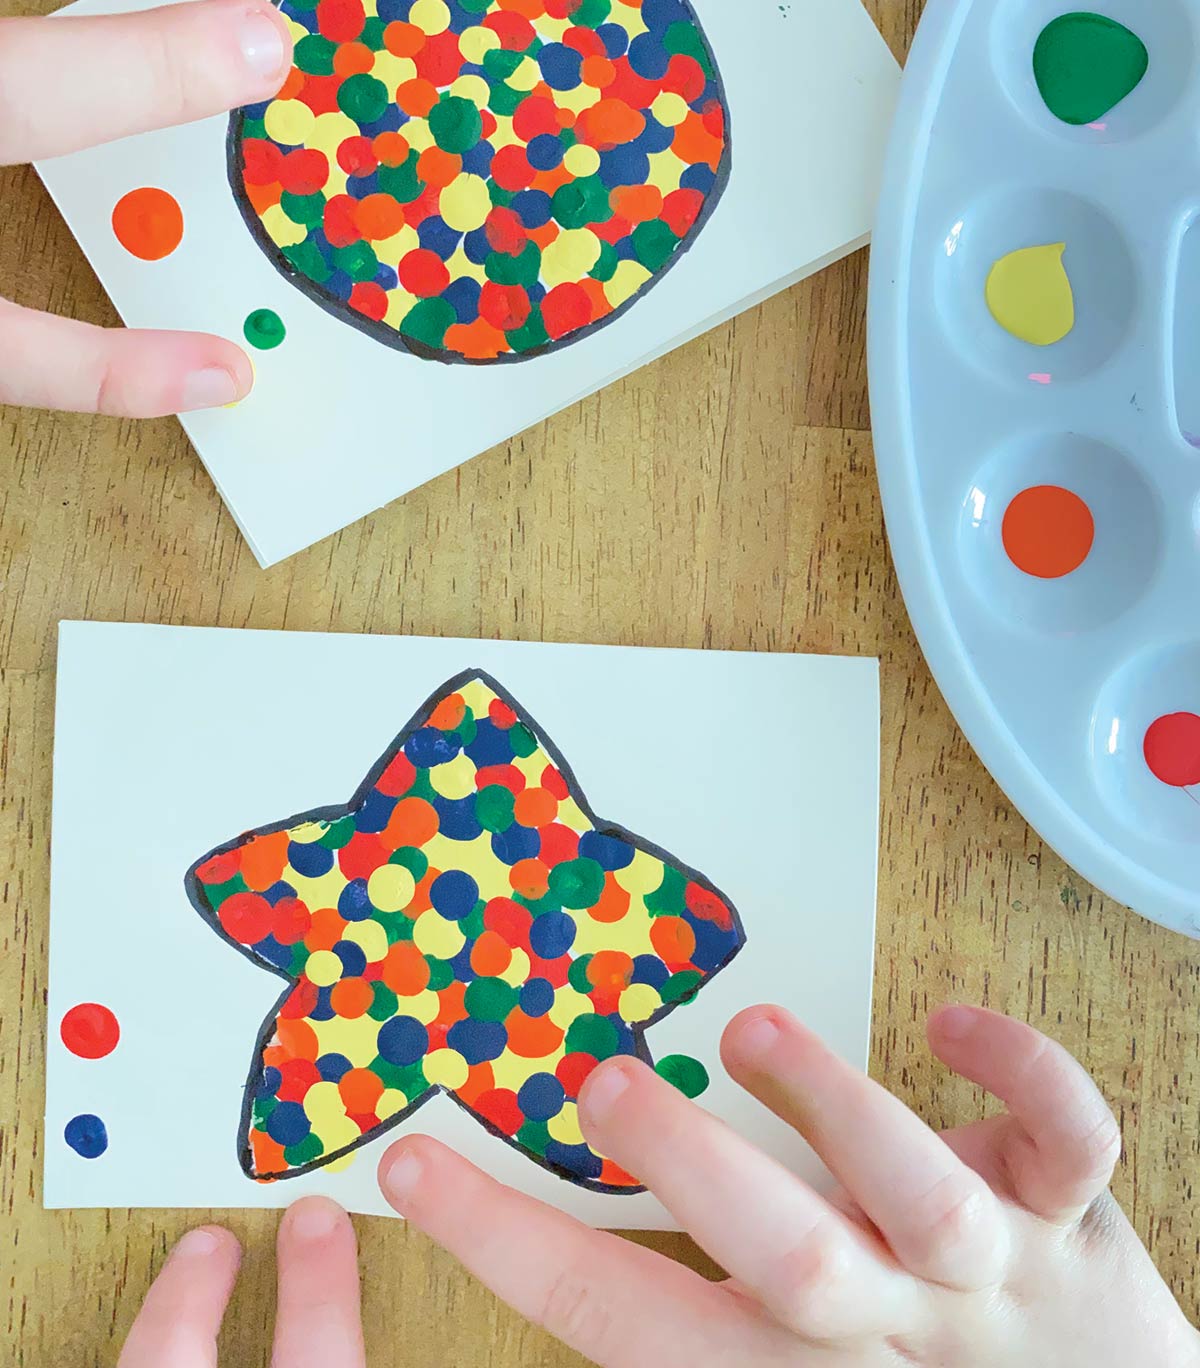
Continue this process until the inside of each cutout is covered with dots of each color.
Tip: Each child can work on several cards at one time before passing them on to someone else if you’re making a large batch of cards together.
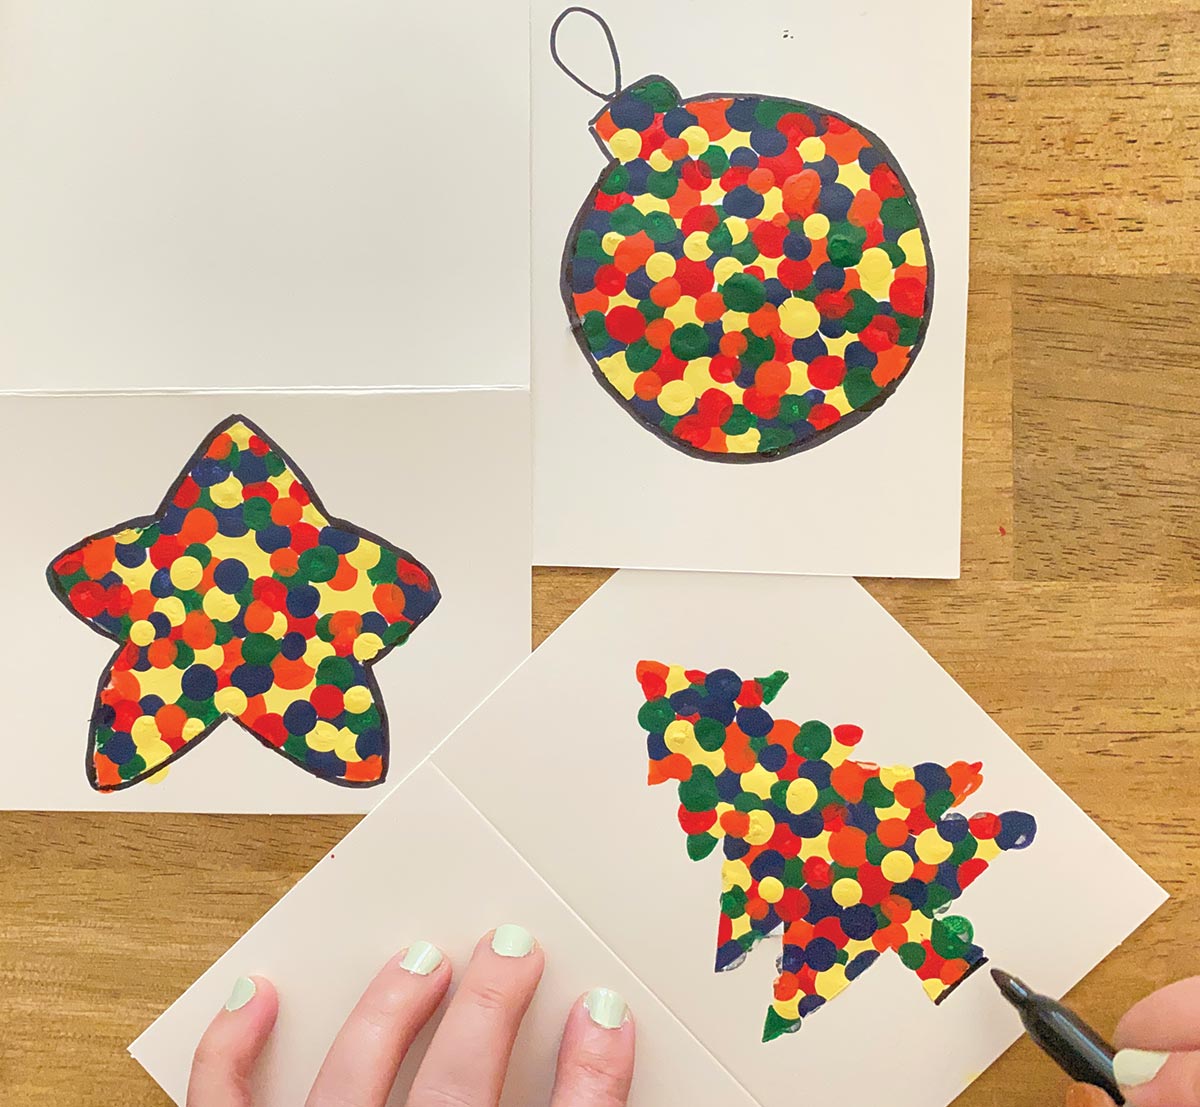
Gently remove the stencil cutouts from the cards and allow the paint to dry. When the cards are completely dry, add these finishing touches:
- Have kids add their signature dots and names to the bottom of each card or inside each card if preferred.
- Outline the shapes with a Sharpie and add accents to the shapes if needed.
- Write Christmas greetings on the cards.
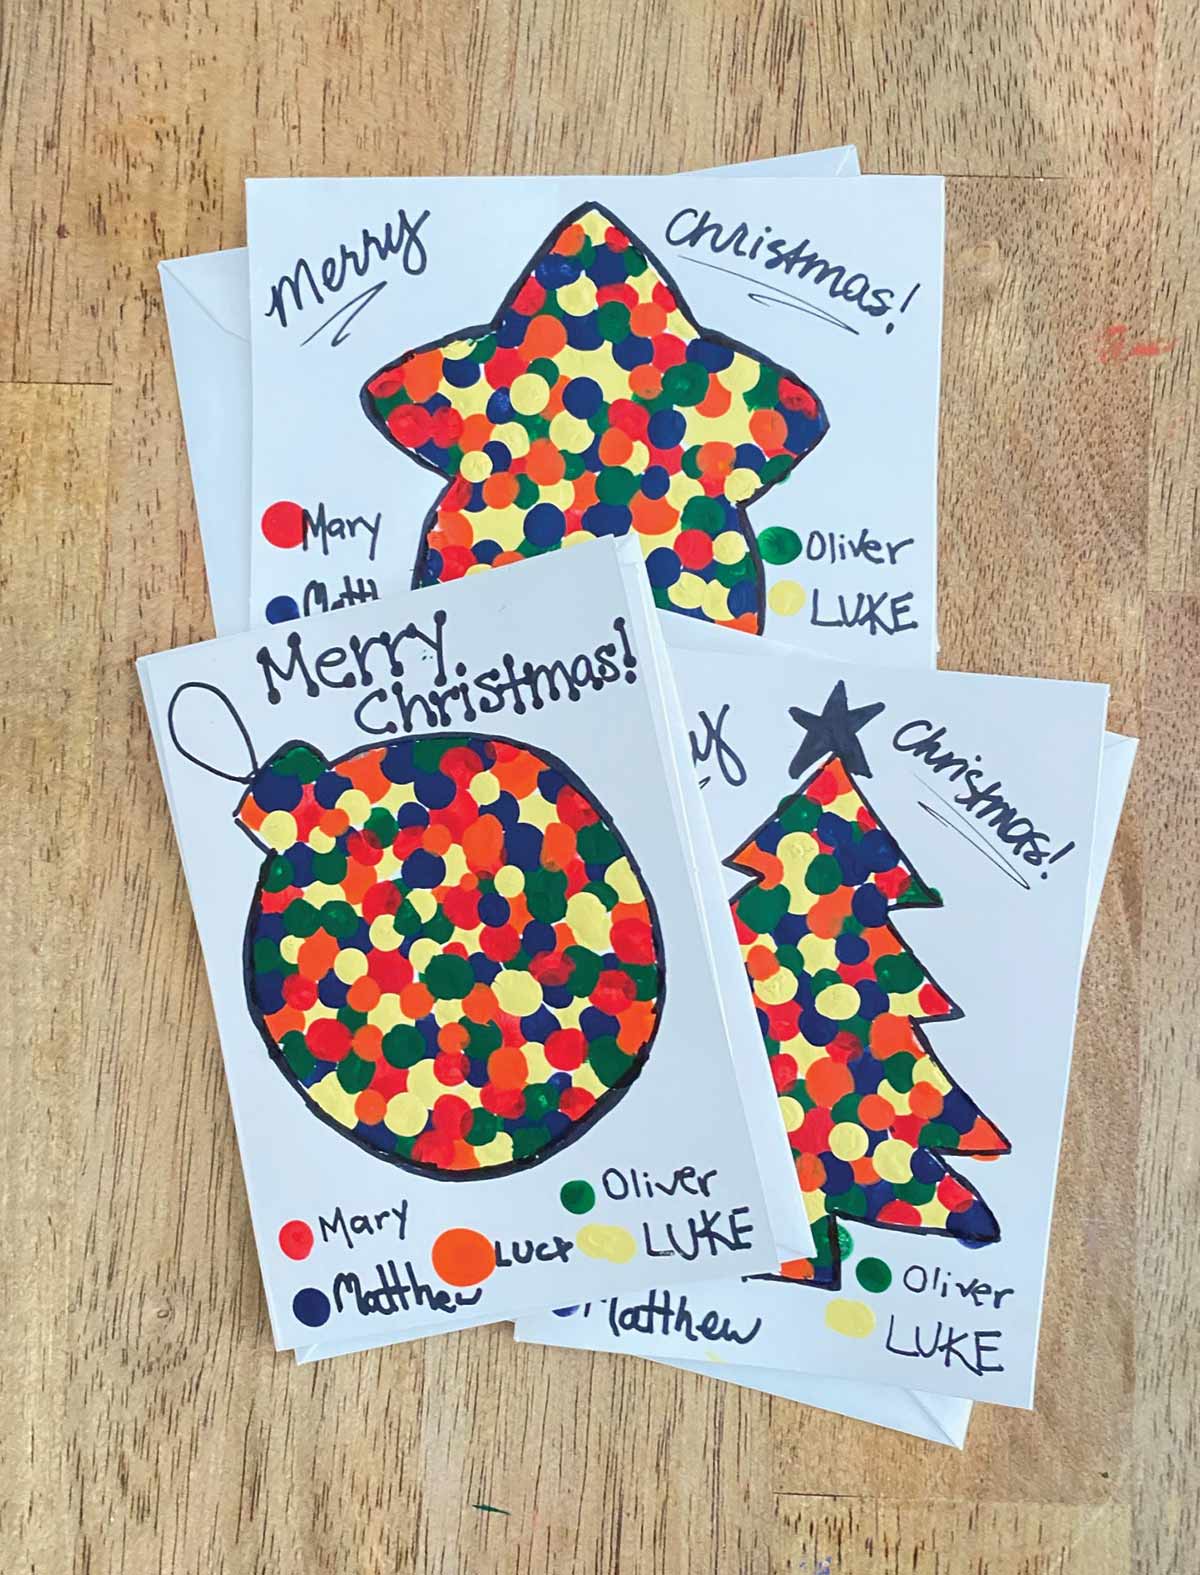
When the accents dry, these collaborative Christmas cards can be signed, addressed, and mailed to friends and family.

Variation 1: Create artwork instead of Christmas cards. Simply exchange the blank greeting cards with canvases and follow the tutorial steps. Then you can display them with your holiday decor or share them as grandparent gifts.
Variation 2: Have kids create their own cards. Provide one stencil cutout, desired number of blank cards, and several paint colors for each child. The final product will look the same, but each child will add all colors on his card. This option allows you to omit the color signatures or replace them with something like, “Handmade by Mary.”

mily Copeland is a homeschool mom of two living in coastal North Carolina. She offers help and hope for home educators at: www.tablelifeblog.com.