From Trash to Treasure:

hen we were selecting a lot on which to build our current home, our builder asked why we chose the one we did. We answered, “Because of the woods behind the house.” While only the first fifteen feet were our property, it was enough space to start a yard waste compost area.
After battling crazy drainage areas and horribly compacted red clay soil the first year in our home, we decided to build garden boxes for growing native plants, fruits, and vegetables.
We started our first year of raised bed gardening with much zeal and enthusiasm. We hauled our utility trailer two miles down the road and brought backfill dirt for the boxes. Plants were placed using a little 10-10-10 fertilizer, our homemade drip system was implemented, and we waited.
Unfortunately, our abundant harvest never arrived. The first year, our yield was abysmal. Despite using some “organic” fertilizer granules and consistent watering, the plants were stunted, and the fruit never grew large enough to ripen.
With the end of the summer season approaching, we realized the topsoil we had purchased lacked nutrients—lots of them! Applying fertilizer granules every three to four weeks was just a band-aid. We needed to build a nutrient-rich base in the boxes to enjoy a better harvest the next growing season.
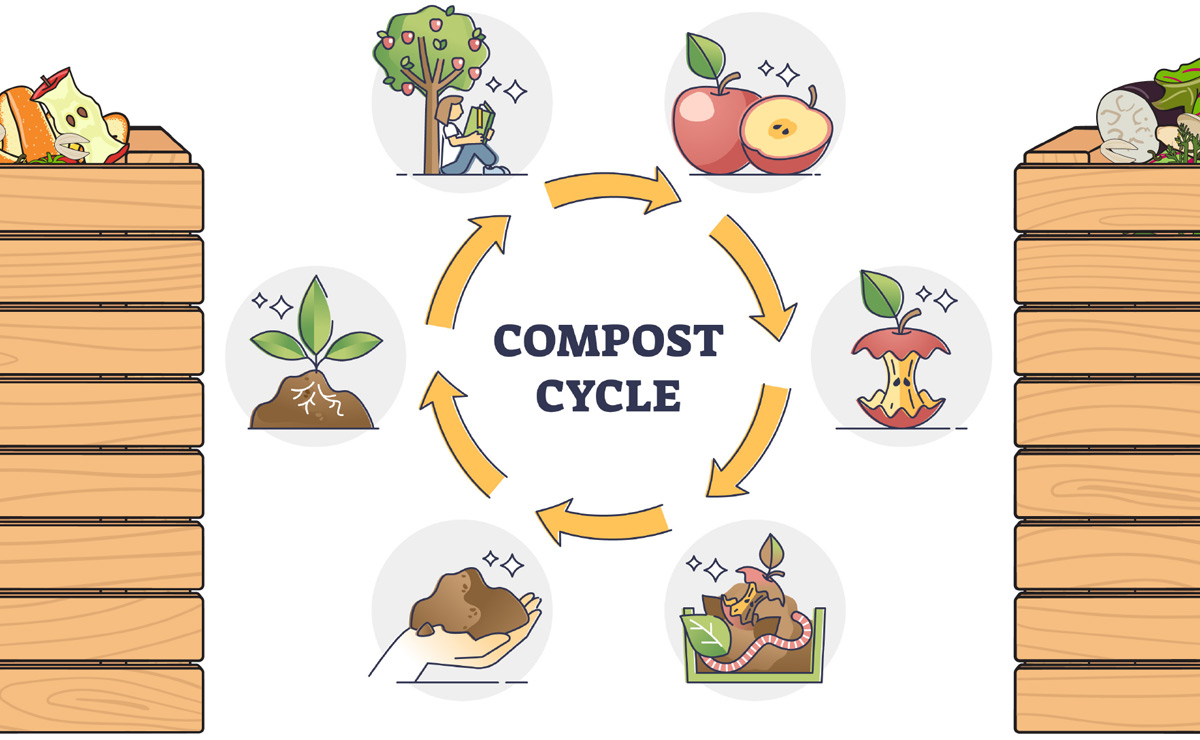
The next time you’re on a hike or nature walk with your children, have them look for signs of decomposition—those dead leaves, twigs, fallen branches and tree trunks are all part of a natural compost pile!
Microorganisms, such as bacteria and fungi, break down dead organic matter and recycle nutrients back into the ecosystem.
These microbes produce enzymes, specialized proteins that speed up chemical reactions and help break down organic matter (leaves, grass clippings, fruit, vegetables) into smaller molecules.

Kitchen scraps like potatoes, corn kernels, and celery stalks contain large molecules of carbohydrates and proteins. When these microbes have plenty of oxygen, they break down carbohydrates and proteins, releasing energy, carbon dioxide, and water.
This is what we want in a compost bin or pile. It’s why a compost pile will release carbon dioxide and have an elevated temperature. The heat is a result of the breakdown process.
When organic materials—food scraps, leaves, and twigs—are placed in a pile without much oxygen, like in a landfill, it undergoes anaerobic decomposition. This causes the production of methane and more acidic liquid byproducts.
This is why waste management companies that pick up our trash have separate collection days for yard waste and/or request yard waste be kept out of household trash cans.
Composting food scraps not only produces nutrients that can be put back into our garden soil, but it also helps keep our landfills free from dangerous gases like methane.
Before starting a compost bin or pile, everyone must be clear on what can and cannot be added to a compost pile. Besides the obvious yard waste of grass clippings and leaves, there are many other things that make great compost as well as many items to avoid.
- Vegetable scraps
- Fruit scraps
- Eggshells
- Coffee filters
- Leaves and grass
- Any meat and fish (These can lead to the growth of salmonella or listeria.)
- Dairy products
- Cooking oil
- The peels of citrus fruits
- Diseased plants
- Plants sprayed with harmful chemicals
- Any animal feces, pet litter
- Treated wood
- Fertilizer (Remove any fertilizer sticks if you are tossing in the potting soil from a planter.)
“The best benefit of composting is the knowledge gained and the time spent together on a family project.”


Compost piles need the following to thrive and stay disease and pest-free. Whatever compost method you choose, make sure these three factors are considered:
Aeration: Aeration refers to the airflow within the pile. Good airflow allows microorganisms to break down organic materials faster.
Moisture: Compost needs to be damp, like a wrung-out sponge. Too much water can cause it to smell. If the pile is too dry, the decomposition process slows down.
Particle Size: Smaller pieces of materials break down faster than larger ones. Chopping or shredding materials helps speed up composting. If I have our chopper out when prepping vegetables or fruit with a meal, I will sometimes run the larger scraps through the food chopper.

Bottom Layer: This bottom layer helps set up the pile for airflow. Use twigs and sticks to help facilitate airflow from the bottom to the top.

Vegetable and fruit scraps, fresh grass clippings, and the softer and greener parts of plants (free of disease) can be added to the green layer of your compost.
Brown Material Layer: We put the brown layer on top of the green layer. The brown materials are rich in carbon, which helps provide energy for the microbes. The brown layer consists of dried leaves, straw, sawdust (but not from treated lumber), and cardboard. The cardboard should be clean and free of grease, paint, or other liquids we do not want in the soil.
Brown materials help create air pockets in the compost pile to keep air flowing. The brown layer also helps absorb some of the moisture.
Continue to alternate the layers of green and brown material. Lastly, we added a little water to moisten the materials.
It is important to turn the compost pile weekly to keep it healthy and free of bad bacteria like salmonella and odors. We opted for a compost bin on a stand with a handle we could easily turn. To turn a pile in your yard, use a pitchfork or shovel.
Check to make sure you don’t have an invasion of rodents. If they appear, it could be materials making their way into the compost bin that shouldn’t be there.
The moisture level should also be checked. If it’s too dry, add a little water. If there is a bad odor, it could be a sign that the pile is too wet.
Once your compost pile has broken down and you have healthy, nutrient-rich soil material, you can add worms to it.
- Gardening gloves and a trowel
- 2 large, clear containers with holes in the lid.
- Soil
- Scraps of vegetables and/or fruits
- A plastic or Styrofoam object (e.g., a bottle cap, part of a Styrofoam cup, the plastic measuring cup from liquid medicine or liquid detergent.)
- A few other pieces of yard debris: a few blades of grass, some leaves, some small twigs
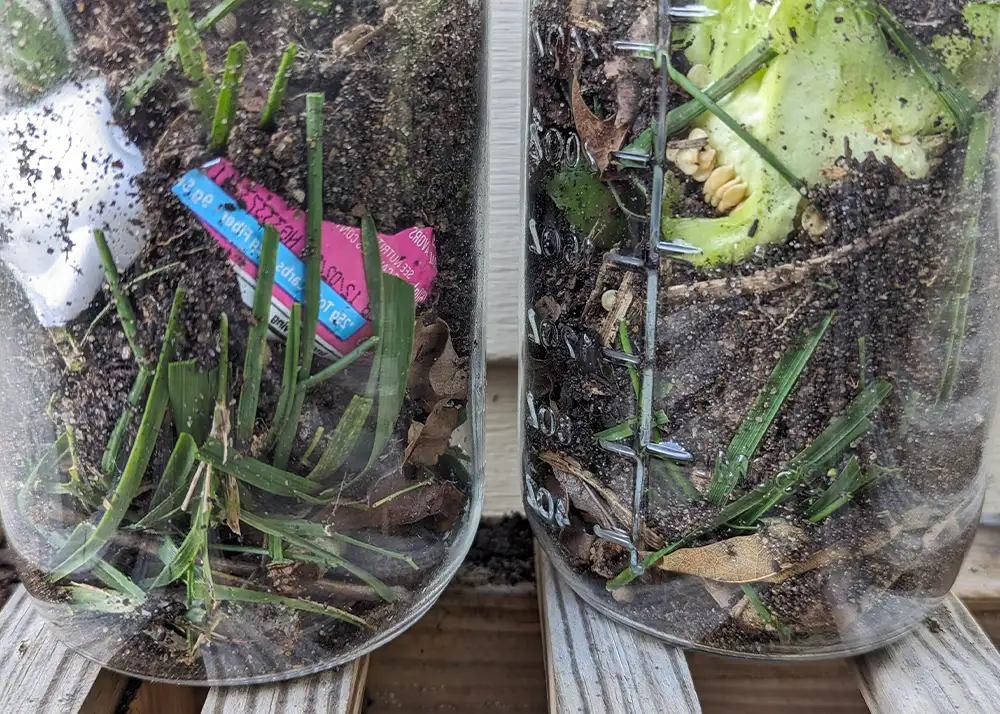
- Place a few pieces of small twigs into the bottom of each clear container. Add some on top of the twigs if you have a few dead leaves.
- Add a few blades of grass, if available.
- Add soil from your garden. You can also use bagged potting soil.
- Add a large piece or two of fruit or vegetables in one jar.
- Add a piece of plastic or Styrofoam in the other jar.
- Top with more soil and grass clippings.
- Pour a little water on top (start with ¼ cup).
Place in a safe place and observe for several days or weeks. You may want to place the jars outside in an area protected from rain.
Record what you see. When you have completed the project, remove the plastic or Styrofoam and toss the jar’s contents into your own compost pile, a natural area, or your garden.


ichelle Moody, is a veteran homeschooling mom and owner of Thehomeschoolscientist.com. After earning a masters degree in child development and education, God’s plan took her into a 12 year biotechnology career. She came home to homeschool. Now, she has returned to her first love of helping children explore and discover the world God has gifted us. Besides homeschooling her own children, Michelle has taught in the traditional classroom, in co-ops, and on the mission field in Bangladesh.