with
Stacy Farrell


It’s time for us all to get back to basics!

How to Start Filling Your Pantry with Dehydrated Foods
ntire books exist solely for dehydrating and providing recipes for the process. I’ve invested in a couple of them myself. In hindsight, it was money down the drain. Trust me on this—put that money toward a quality dehydrator or some Mason jars for storing your dried goods.
Dehydrating food is a simple, straightforward process. You don’t need to follow recipes, and you don’t need to use a different temperature setting for every food. Let’s talk about what you actually need to know to get started.
Also, don’t underestimate how addicting it can be to dehydrate food. I will almost guarantee you’ll want to dry more than you think you will, so consider opting for a dehydrator with eight to ten trays.
Personally, I have used and loved my Excalibur dehydrator for several years now.

Foods that dehydrate well include:
Foods that just aren’t worth the effort, in my humble opinion, include:
- Oranges
- Cucumbers
- Papaya
- Bananas
- Cauliflower
Begin with These Bare-Bone Basics of Dehydrating
Temperature: I dehydrate almost everything at 125 degrees Fahrenheit. This low-and-slow method prevents overdrying and preserves more of those fragile nutrients. The only time I change the temperature is for herbs and greens (lower it to 95°F) and for meat (increase it to 150°F).
Drying Time: Simply continue until the product is thoroughly dry. For the vast majority of foods, that will be between seven and twelve hours.
More important than a specific time is knowing the signs of proper dehydration:
- Herbs and greens: Rub between your fingers. If it practically turns into a powder, it’s done.
- High-sugar fruits: Cut or snap the fruit in half and squeeze it. You shouldn’t see any moisture droplets emerge from the cut surface.
- Low-sugar fruits: When you break a piece, it should snap. It may even flake and peel a little.
- Vegetables: You should hear a snap when you break it in half. Alternatively, some thoroughly dry veggies like corn will be so hard that you can’t break them at all.
Storage: Dried foods need to be sealed in an airtight container and stored in a dry, dark place and preferably somewhat cool. My favorite method is to vacuum seal dehydrated foods in Mason jars and store behind closed doors.
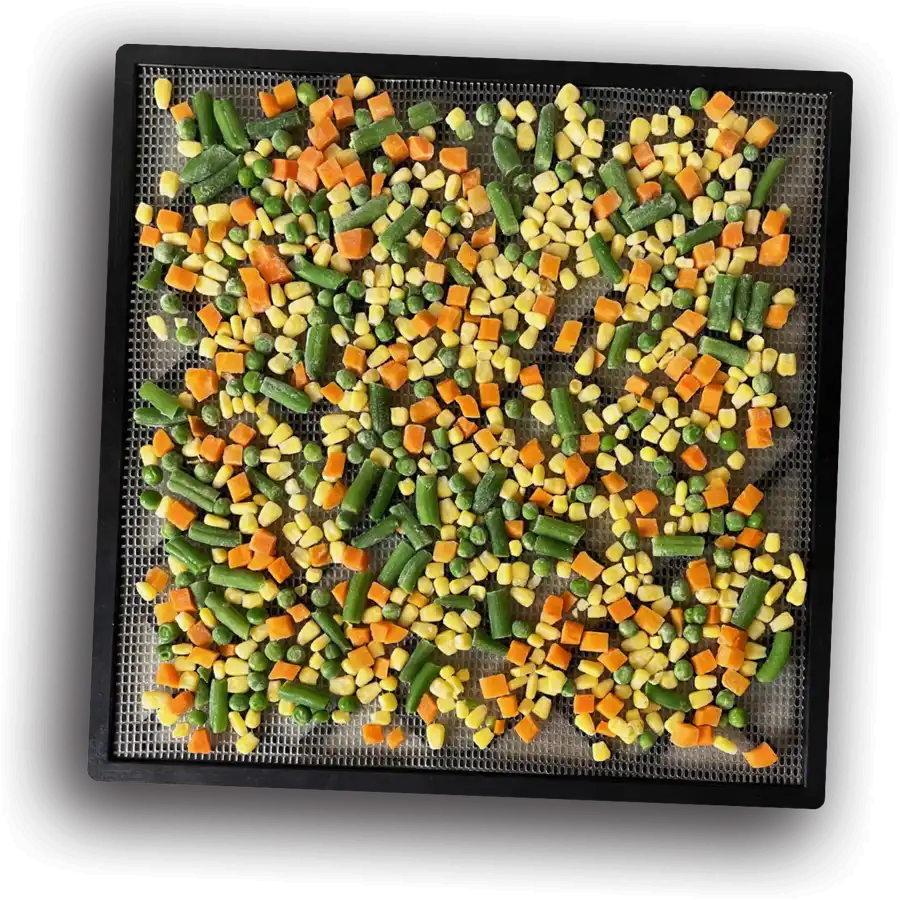
Easy Beginner-Friendly Dehydrating Project
ot only are they already chopped for you, but they are pre-blanched to lock in their vibrant color. Though, remember, that’s not 100% necessary.
It can also be a cost-effective way to build up your pantry fast because you can shop sales and stock up without worrying about fresh produce spoiling before you have time to deal with it.
I highly recommend starting with a couple bags of frozen mixed vegetables due to their versatility (think soups, chicken pot pie, and casseroles).
Simply pour them straight from the bags onto your trays and dehydrate at 125°F for eight to twelve hours until thoroughly dry.


For all other uses, you’ll need to rehydrate first. You can do a quick rehydrate with boiling water or a slow rehydrate by submerging in water and setting at room temperature until you’re ready to cook. We have a complete guide to rehydrating foods.
- Chicken pot pie (mixed veggies)
- Shepherd’s pie (mixed veggies)
- “Just add water” meals in jars
- Chicken and dumplings (peas and carrots)
- Veggie saute side dishes
- Squash or zucchini fritters
- Dehydrated potato soup
- And lots more!
If you’re on a journey to build a long-term pantry filled with preserved, shelf-stable foods, check out our Free 1-Year Food Storage Plan.
Blessings!


tacy Farrell, was surprised by Jesus when she went from being an unmarried, childless, 30-something career woman to a Christ-following wife of 30+ years with two sons she homeschooled K-12. She’s the author of 20+ books—including the award-winning Philosophy Adventure, and Food Prep Guide: A Plan for Money-Saving, Self-Sustaining Abundance in Hard Times.
You’ll find helpful food preservation, pantry storage & gardening tutorials on the Food Prep Guide YouTube channel she produces with her amazing assistant Jordan, and food prep and homeschool resources at HomeschoolAdventure.com and FoodPrepGuide.com.